It is very rare that I get an opportunity to do a hardware review. Most of my previous reviews have been games of some sort. However. I now have an opportunity to do my first hardware review.
The backstory behind this is that I am in the process of getting a lot of equipment together for my next computer upgrade. Part of this was needing to improve my storage situation. My current rig has a 512gb NVME drive and a 3TB hard drive. With the hard drive being quite a few years old and getting a bit full, I felt it was high time to give some serious thought to my storage situation.
It should be stated that Asustor did not contribute to this review. This is a piece of equipment I paid for myself with the intent of installing it into my own network for my own use. I wanted to provide a bit of a review here, and at least some cursory information as to how I set mine up which people can use to work out if this is a good option for them.
The Scenario
Before we delve into the review proper, I think it’s worthwhile looking at the reason why I chose this particular unit.
My storage needs have traditionally been particularly simple. I use a single NVME drive to handle the stuff that needs the extra performance, such as my operating system and games. I have kept a single 3TB hard drive just for document storage and playback of movies and music, with an external hard drive that I connect as needed to backup anything I can’t afford to lose. This stuff doesn’t typically need super-fast performance, so a traditional hard drive is a better option for me. Itr doesn’t even need to be a super-fast hard drive, as it is simple data storage.
As I’m looking to build myself a new PC, I had originally planned on using a similar setup. I was going to add an 8TB drive for long term storage, and use two NVME drives – one for the usual operating system and drives, and one as a video editing scratch drive for possible future projects. However, now that we’re talking about larger capacities, I felt it wise to also look at adding RAID for an additional layer of redundancy.
I had originally bought a Seagate Barracuda 8TB drives. Once I decided to go RAID, I bought a second matching drive. They’re not necessarily the best drives for RAID, but I tot them for a decent price, and I anticipate the only difference will be a hit in write performance. For my use, this isn’t going to matter so much. For those where write performance will be an issue, the Seagate Ironwolf or WD Red drives would be a better choice as these are specifically designed to work in a NAS.
I didn’t really want to shell out on an all-singing all-dancing unit. I really just wanted something I could use as a fileserver with a bit of additional redundancy. If I need additional services, I have other ways of running them. That’s what lead me to considering this unit.
Specs
This particular unit comes in both a 2-drive and 4-drive variants. The one I am reviewing today is the 2-drive unit. Both units support expansion modules that connect via an onboard USB-C port, so I could add additional drives later if required.
The units are equipped with a Realtek RTD1296 1.4Ghz Quad-Core CPU, 1GB of onboard RAM, and a single 2.5 gigabit network port.
The unit supports a wide variety of options to share your data over the network, including SMB for Windows, AFP for Mac users, and a variety of different protocols for Linux systems, including NFS and Rsync. The 2-drive unit supports RAID levels 0 and 1 as well as JBOD, while the 4-drive unit also supports RAID 5, 6 and 10.
Each drive bay supports a maximum 18TB capacity per drive.
It should be noted that the RAM is not upgradeable, and the CPU is starting to age now. I’ll cover this a little more later, but depending on how you plan to use the unit, this may or may not be an issue.
Initial Setup
One thing I noticed when opening the box was that the power brick is separate from the main unit. Some people may not like this as it makes your cabling a little messier. I really appreciate it though. If the power brick ever fails, it doesn’t require performing surgery on the unit to replace it. You can either buy one directly from Asustor, or see if your local electronics store has a generic power supply that can act as a replacement.
Getting the case open to install your drives was easy enough. You take out two screws, and lift the case off. Installing the drives was equally easy. Just slide the drives in, snap them into place, and use the provided screws to hold them in place.
Getting the case back on is a little fiddlier. This is mainly due to a slightly quirky design which leads you to think it’s best to reattach the case from the front. You actually need to reattach it from behind.
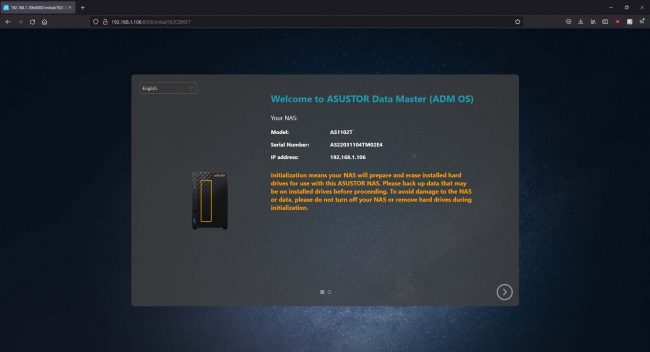
Once you have plugged it in, you will need to configure it. This will involve any web browser, although you will need to find out what IP address it has been given. This can be a little bit tricky sometimes, but most routers will allow you to log in to them and see the IP addresses of the devices that are connected. It’s usually fairly obvious which one is your NAS. You can then enter this into your web browser to start configuring it.
You do get the option of either a one-click setup or a manual setup. I world normally recommend doing a manual setup, as this gives you a little more control over how the device is configured. I’d also recommend making sure that you plan how you want to run your storage before you do this, as it’s better to get this stage right from the beginning rather than going in and change it later. At the very least, you want to familiarise yourself with the different RAID levels available so you can choose which one is most appropriate for you. Wikipedia can be a great reference for this.
The setup process is not necessarily difficult, as long as you know what you want. It basically involves providing some network settings, as well as importantly a friendly name, and your time zone, and then choosing your disk layout. The last part is why you need to have planned ahead so you can make an appropriate decision. Once you’ve made a decision, it’s a simple case of choosing what RAID level you want and what drives you want to apply it to.
One curious quirk is that you can set it to obtain an IP address automatically via DHCP, but if you don’t specify a DNS server, updating won’t work correctly. Unless you have specific requirements, you can easily get around this by setting the DNS server to your router’s IP address. It’s a bit of a silly quirk given that DHCP allows these to be obtained automatically.
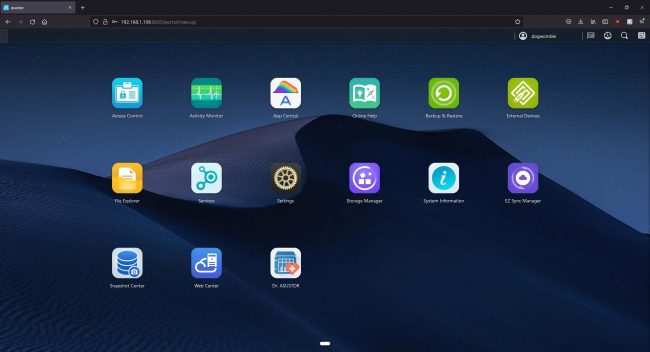
Once you’ve done that initial wizard, you will be presented with this screen, where you may need to do a few extra steps to complete everything. The device will typically only set itself up for SMB sharing, so if you’re not using Windows, you will need to go into the Services applet and enable anything you need for your operating system of choice.
You will then need to go into the Access Control applet and then Shared Folders to set up a series of shared folders if the ones provided aren’t appropriate for your needs. Once you’re in here, it’s a case of giving the shared folder a name, selecting the volume if you have more than one, clicking on Next and setting what file permissions you want.
The final place you’ll want to go is into Storage Manager and then click on your volumes. If this shows as “Synchronizing”, the drive will not be completely usable as it is still building the array. For larger drives, be prepared to wait a while – in some cases several hours – before this can be used. I’ve let mine run overnight before trying ot use it just to allow sufficient time to build the array.
Performance
I won’t be able to do a complete test of performance here. The main reason is that, while the NAS drive supports 2.5 gigabit, am my home equipment will only allow me to top out at 1 gigabit. I am also using drives that weren’t really supposed to be used as NAS.
In this respect, you can think of this as the “worst case scenario”. This will be essentially the minimum performance you can expect out of this unit in a RAID 1 configuration on a gigabit network. While I’m unable to test whether this unit can achieve 2.5 gigabit, this upgrade path is at least available.
It should be noted that the inclusion of 2.5 gigabit is surprising given the low price point. It is common for more expensive units to use dual gigabit. These provide lower bandwidth and are not quite as plug-and-play, so having this in a single port is slightly easier for those not so technically inclined.
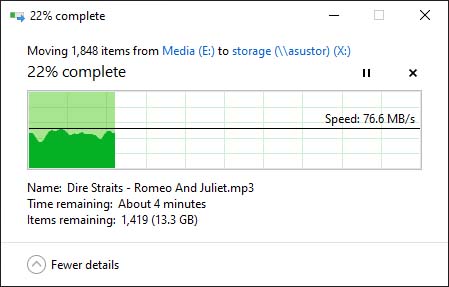
Starting to move my music collection over, and speeds were hovering about 70 megabytes a second. This means the gigabit connection I was running with was only about 70% utilised.
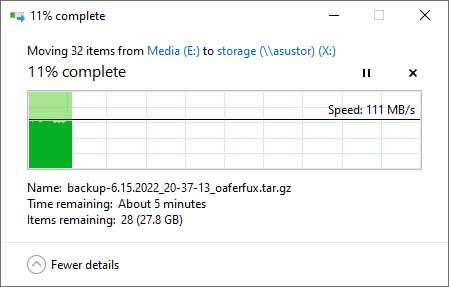
Moving up to my backups folder and the file transfer went well over 100 megabytes a second, which is about the maximum my 1 gigabit link can accomplish.
This can be partially explained by the fact Windows tends to copy single large files more efficiently than multiple small files. It does show, though, that an upgrade to 2.5 gigabit may only be of benefit to certain workloads where large files are common. Given it did max it out for large files it does not seem the drives I chose are the bottleneck.
Some final notes
I made a reference earlier to the older CPU and having non-upgradeable RAM. There is a reason for this.
Like most NAS units, you have the ability to add additional applications. There is a reasonable library of other applications you can add, such as a Plesk media server or a whole host of other applications. While I didn’t specifically test these, this is where I would expect issues to arise.
Plesk in particular is known for having the ability to transcode videos to different resolutions as it serves them to the client, which requires a decent amount of CPU power. You might get away with this for a single user. For multiple users, the Asustor unit will likely struggle. As this in particular is a common use for NAS drives, you may need to take this into account.
In my case, I am using my NAS for simple file sharing. I’m not planning on running any additional applications on top of this, as I have other ways of running them if I need to.
Verdict
If you’re looking for running a whole host of additional services on your NAS, this unit may not be the best choice. The less capable CPU and only 1GB of non-upgradeable RAM would limit the performance of these services.
However, if all you’re after is simple file storage that is available to your entire network, this unit could be a winner. The lower cost of the unit compared to some of the other more premium options allows you to invest more into your drives.
Having 2.5 gigabit Ethernet allows for an upgrade path beyond gigabit that’s easier to set up than some of the dual gigabit options found in more expensive units. However, given that Windows was struggling to max out the bandwidth under certain workloads, this may or may not benefit you.
